Overview
This guide provides a step-by-step process for automating the extraction, processing, and integration of app analytics data from Apple’s App Store Connect API into Mixpanel for analysis. We will go over how to set up JWT-based authentication, create and manage report requests, retrieve report segments, and finally parse and send data to Mixpanel.
Prerequisites
Before starting, make sure you have the following:
- Apple Developer Account with App Store Connect API access. This includes:
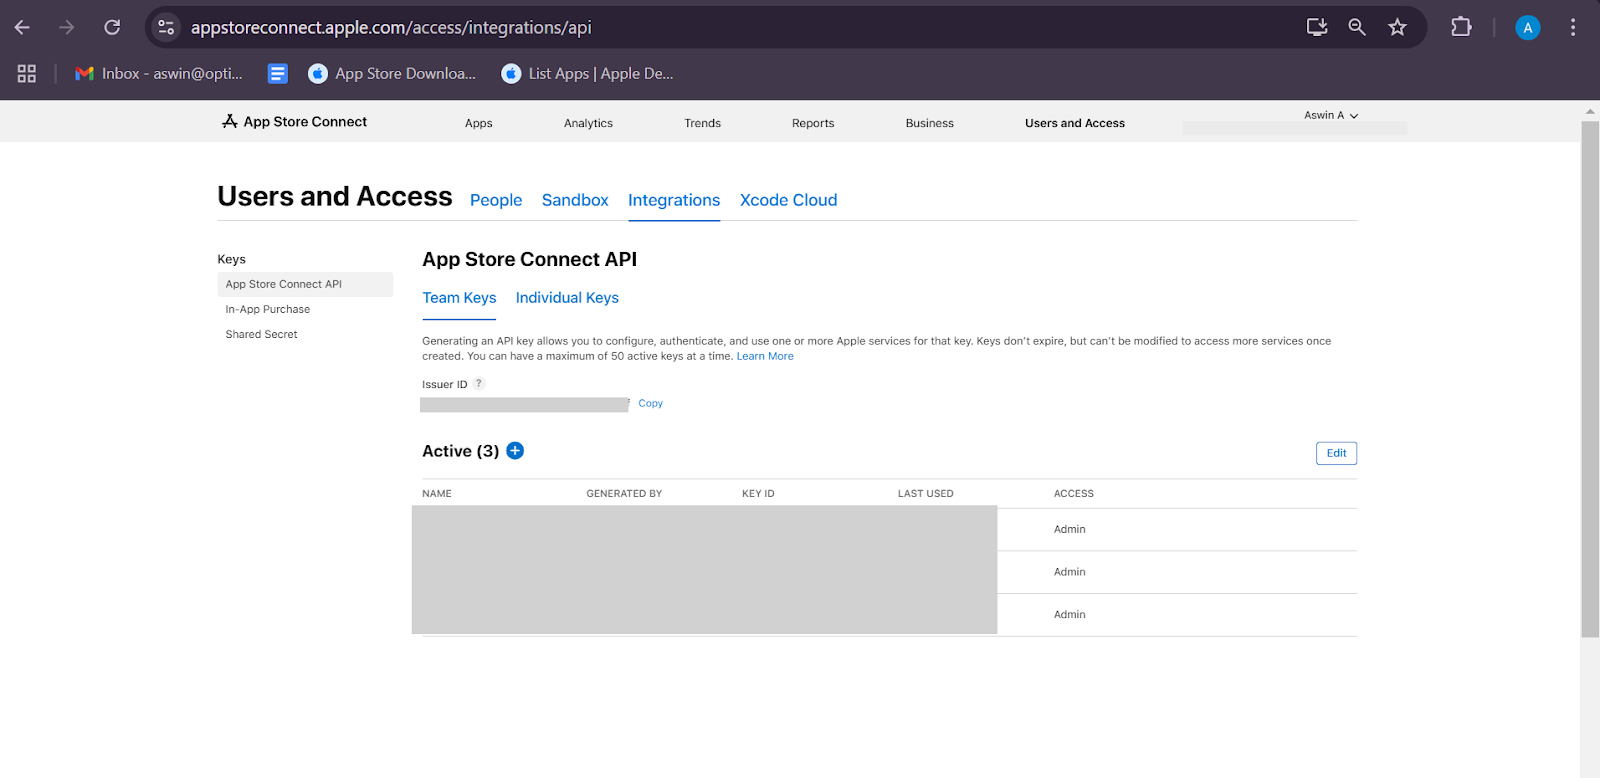
- Access to generate API keys in Users and Access > Keys.
- A valid .p8 key file downloaded for JWT authentication.
- Mixpanel Account for tracking and analysing app events. Obtain:
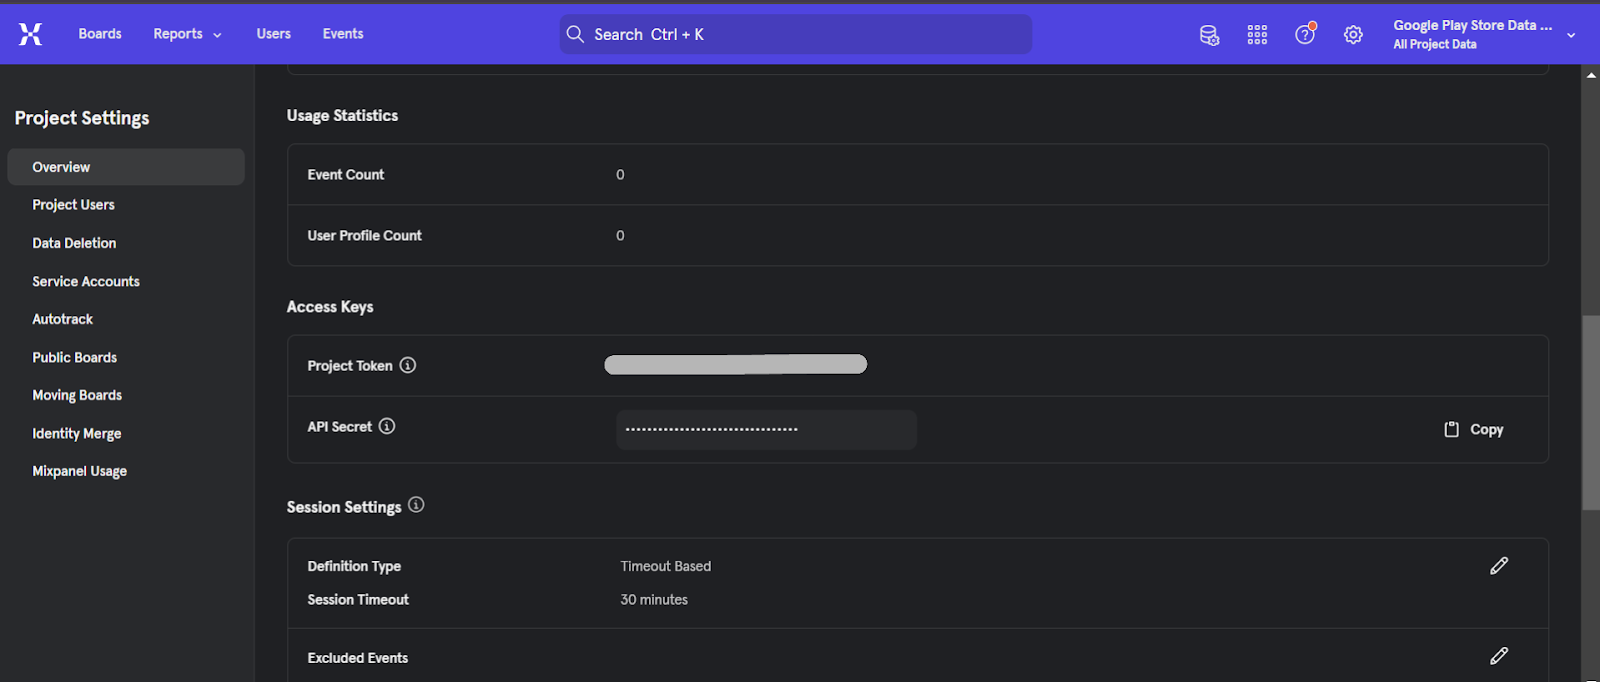
- Project token and secret key from the Mixpanel project settings.
- Node.js installed on your machine along with these Node.js packages:
- jsonwebtoken for generating JWT tokens.
- node-fetch for making HTTP requests.
- zlib and csv-parser for handling and parsing data.
- fs and path for file handling and directory management.
- mixpanel for integrating with Mixpanel’s API.
Step-by-Step Guide
Step 1: Establish a JWT Connection to App Store Connect
The App Store Connect API requires JWT (JSON Web Token) authentication, which involves creating a token using a .p8 key file and additional information from your Apple Developer account.
1.1 Obtain the .p8 Key File, Key ID, and Issuer ID
In your Apple Developer account:
- Go to Users and Access > Keys and create a new API key.
- Download the .p8 key file and store it in your project directory.
- Note the Key ID associated with the API key; you’ll need it for the JWT header.
- To find the Issuer ID:
- Go to Users and Access in your developer account, and you’ll see the Issuer ID listed at the top of the page.

1.2 Configure JWT Authentication in Your Code
To create the JWT, you’ll need the Key ID, Issuer ID, and Private Key from the .p8 file setup.
Import necessary libraries:
const fs = require('fs');
const jwt = require('jsonwebtoken');
const path = require('path');
- Load the private key:
- The private key itself is in the .p8 file, which you’ll load into your code to sign the JWT.
const KEY_ID = 'YOUR_KEY_ID'; // Found in your developer account with the API key
const ISSUER_ID = 'YOUR_ISSUER_ID'; // Found in Users and Access in your developer account
const PATH_TO_KEY = path.join(__dirname, 'AuthKey.p8');
const privateKey = fs.readFileSync(PATH_TO_KEY, 'utf8');
- Generate the JWT token with an expiration time (usually 20 minutes):
javascript
Copy code
const token = jwt.sign(
{ iss: ISSUER_ID, exp: Math.floor(Date.now() / 1000) + (20 * 60), aud: 'appstoreconnect-v1' },
privateKey,
{ algorithm: 'ES256', header: { alg: 'ES256', kid: KEY_ID, typ: 'JWT' } }
);
The token variable now holds the JWT, ready for authentication with the App Store Connect API. (https://appstoreconnect.apple.com/access/integrations/api)
Step 2: Create a Report Request on App Store Connect
With the JWT token, we can create a report request to start retrieving app metrics. Apple allows reports to be configured as ONGOING (for continuous updates) or ONE_TIME_SNAPSHOT (for a single snapshot).
2.1 Define the Request Data
Specify the report type (ongoing or one-time) and include your app ID:
const requestData = {
data: {
type: 'analyticsReportRequests',
attributes: {
accessType: 'ONGOING', // or ONE_TIME_SNAPSHOT for a single snapshot
},
relationships: {
app: {
data: {
type: 'apps',
id: 'YOUR_APP_ID'
}
}
}
}
};
2.2 Send the Request
Make a POST request with the JWT token to initiate the report request:
async function createReportRequest() {
const url = 'https://api.appstoreconnect.apple.com/v1/analyticsReportRequests';
const options = {
method: 'POST',
headers: {
Authorization: `Bearer ${token}`,
'Content-Type': 'application/json'
},
body: JSON.stringify(requestData)
};
try {
const response = await fetch(url, options);
const data = await response.json();
if (data.data && data.data.id) {
console.log(`Created report request ID: ${data.data.id}`);
}
} catch (error) {
console.error('Error creating report request:', error);
}
}
Step 3: Retrieve Report Requests by Category and Name
You can filter reports by specific categories (e.g., APP_USAGE, APP_STORE_ENGAGEMENT) and by name. This helps in customising data queries based on various parameters.
async function getReportByCategory(category, name) {
const url = `https://api.appstoreconnect.apple.com/v1/analyticsReportRequests?filter[category]=${category}&filter[name]=${name}`;
const headers = {
Authorization: `Bearer ${token}`,
'Content-Type': 'application/json'
};
try {
const response = await fetch(url, { method: 'GET', headers });
const data = await response.json();
console.log('Report Data:', data);
} catch (error) {
console.error('Error fetching report by category:', error);
}
}
Step 4: Fetch and Process Report Instances
After confirming the report request’s creation, retrieve specific instances of reports, which can include additional parameters to refine data by date, granularity, and other attributes.
Query Parameters Available:
- granularity: Specify the data frequency, such as DAILY, WEEKLY, MONTHLY.
- processingDate: Filter data based on a particular date. etc..
async function getReportInstances(reportRequestId) {
const url = `https://api.appstoreconnect.apple.com/v1/analyticsReportRequests/${reportRequestId}/instances?filter[granularity]=DAILY&filter[processingDate]=YOUR_DATE`;
const headers = { Authorization: `Bearer ${token}`, 'Content-Type': 'application/json' };
try {
const response = await fetch(url, { method: 'GET', headers });
const data = await response.json();
console.log('Report Instances:', data);
} catch (error) {
console.error('Error fetching report instances:', error);
}
}
Step 5: Fetch Segment Data
Once the report instances are available, each instance contains segments that give specific data points. Retrieve segments by accessing the segment URL provided in the report instance data.
async function getSegmentsForInstance(instanceId) {
const url = `https://api.appstoreconnect.apple.com/v1/analyticsReportInstances/${instanceId}/segments`;
const headers = { Authorization: `Bearer ${token}`, 'Content-Type': 'application/json' };
try {
const response = await fetch(url, { method: 'GET', headers });
const data = await response.json();
const segmentUrl = data.data[0].attributes.url; // Get the URL for downloading data
if (segmentUrl) {
downloadReportData(segmentUrl);
}
} catch (error) {
console.error('Error fetching segments:', error);
}
}
Step 6: Download and Extract the Report Data
After retrieving the download URL from the segment data, download and decompress the data (often in .gz format).
async function downloadReportData(url) {
const dir = path.join(__dirname, 'reports');
const gzPath = path.join(dir, 'report.gz');
const csvPath = path.join(dir, 'report.csv');
if (!fs.existsSync(dir)) fs.mkdirSync(dir, { recursive: true });
const response = await fetch(url);
const fileStream = fs.createWriteStream(gzPath);
response.body.pipe(fileStream);
fileStream.on('finish', () => {
fs.createReadStream(gzPath)
.pipe(zlib.createGunzip())
.pipe(fs.createWriteStream(csvPath))
.on('finish', () => console.log('Report downloaded and extracted'));
});
}
Step 7: Parse CSV and Send Data to Mixpanel
With the CSV data available, parse it and send it to Mixpanel for tracking.
Parse the CSV Data:
fs.createReadStream('report.csv')
.pipe(csv())
.on('data', (row) => {
console.log('Parsed Row:', row);
// Add logic to structure data for Mixpanel
})
.on('end', () => {
console.log('CSV Parsing completed.');
});
Send Data to Mixpanel: Initialize Mixpanel and send parsed data:
- Create a Mixpanel Account:
- Visit Mixpanel (https://mixpanel.com).
- Click Sign Up if you are new or Log In if you already have an account.
- Set Up a Project
- Click Create New Project from the Projects tab on your dashboard.
- Name your project, such as "Google Play Store Data Integration" and click Create Project.
- Retrieve Project Token and API Secret:
- Go to Settings > Project Settings under your project.
- Copy the Project Token.

- Access the API Secret under Service Accounts if not already created.
- Store Mixpanel Credentials
- Install Mixpanel Library:
npm install mixpanel
const mixpanel = require('mixpanel');
const mixpanelImporter = mixpanel.init('YOUR_PROJECT_TOKEN', {
secret: 'YOUR_SECRET_KEY',
host: 'api.mixpanel.com'
});
function sendToMixpanel(data) {
mixpanelImporter.track('Event Name', data, (err) => {
if (err) console.error('Error sending data to Mixpanel:', err);
else console.log('Data sent to Mixpanel');
});
}
Conclusion
Following this guide allows you to automate the entire process of fetching, processing, and sending Apple App Store data to Mixpanel for advanced insights. With this integration, you gain a streamlined way to track app performance and make data-driven decisions.
Refer to the Apple Store Connect API (https://developer.apple.com/documentation/appstoreconnectapi/downloading-analytics-reports) and Mixpanel API (https://developer.mixpanel.com/reference/overview) Documentation for further details.