
.png)
Introduction
This guide demonstrates how to stream events from Stripe webhooks to Mixpanel using a Google Cloud Function or an AWS Lambda function. The setup requires approximately 10-15 minutes and access to a GCP or AWS account with appropriate permissions.
Prerequisites
- GCP account with Cloud Functions access or AWS account with Lambda access.
- Stripe account with webhook configuration capabilities.
- Mixpanel project token for importing data.
Approach 1: Using Google Cloud Platform (GCP)
Step 1: Create a Cloud Function
- Navigate to the GCP Console and create a new Cloud Function.
- Set the trigger type to HTTPS.
- Enable Allow Unauthenticated Invocations since Stripe will call this function.
- The function name (e.g., track-stripe) will appear in the URL (e.g., https://us-central1-<your-project>.cloudfunctions.net/track-stripe). Use the name chosen during creation.
Step 2: Deploy the Code
Use the following Python code to handle Stripe webhook data and send it to Mixpanel
import functions_frameworkimport jsonimport requestsimport uuid # Library to generate UUIDs@functions_framework.httpdef product(request): req = request.get_json(silent=True) # Ensure metadata exists and extract distinct_id metadata = req['data']['object'].get('metadata', {}) # Default to empty dict distinct_id = metadata.get('distinct_id', str(uuid.uuid4())) # Fallback to UUID # Construct the properties dictionary properties = { '$insert_id': req['id'], '$device_id': distinct_id, # Use distinct_id or fallback 'time': req['created'], 'utm_campaign': metadata.get('utm_campaign'), 'utm_content': metadata.get('utm_content'), 'utm_id': metadata.get('utm_id'), 'utm_medium': metadata.get('utm_medium'), 'utm_source': metadata.get('utm_source'), 'utm_term': metadata.get('utm_term'), **req['data']['object'] } properties = {k: v for k, v in properties.items() if v is not None} # Construct the event payload e = { 'event': req['type'], 'properties': properties } # Send the request to Mixpanel resp = requests.post( "https://api.mixpanel.com/import", params={"strict": "1"}, headers={ "Content-Type": "application/x-ndjson", "User-Agent": "mixpanel-stripe" }, auth=(request.args.get('token'), ""), data=json.dumps(e), ) print("mixpanel resp", resp) # Log the response and return it if resp.status_code != 200: print(f"Mixpanel error: {resp.status_code}, {resp.text}") else: print("Mixpanel event logged successfully") return resp.json()
- Create a requirements.txt file with the following content:
functions-framework==3.*
requests
Deploy the function in the GCP Console with the code and requirements.txt.
Step 3: Configure Stripe Webhook
- In the Stripe Dashboard, go to Developers > Webhooks.
- Add a new webhook and paste the Cloud Function URL with the Mixpanel token (e.g., https://us-central1-<your-project>.cloudfunctions.net/track-stripe?token=<your_token>).
- Select all events and save.
Step 4: Test the Integration
- Open the Stripe Shell (bottom right corner of the Stripe Dashboard).
- Use the stripe trigger command to test an event (e.g., stripe trigger checkout.session.completed).
- Check the webhook status and response in the Stripe Webhooks section to confirm success.
Approach 2: Using Amazon Web Services (AWS)
Step 1: Create a Lambda Function
- Navigate to the AWS Management Console and create a new Lambda function.
- Choose Python 3.11 as the runtime.
- Set up an API Gateway trigger with an HTTP endpoint.
Step 2: Deploy the Code
Use the following Python code to handle Stripe webhook data and send it to Mixpanel.
Save this as lambda_function.py.
import jsonimport requests
def lambda_handler(event, context):
# Parse the incoming event (Stripe webhook data)
# event is the raw HTTP request body from Stripe
req = json.loads(event['body']) if isinstance(event.get('body'), str) else event
# Extract the event type from the Stripe event
event_type = req.get('type', 'unknown_event')
# Get the customer ID or use a fallback distinct_id (e.g., charge ID)
customer_id = req.get('data', {}).get('object', {}).get('customer')
distinct_id = customer_id if customer_id else req.get('data', {}).get('object', {}).get('id', 'default_user_' + req.get('id', 'unknown'))
e = {
'event': event_type,
'properties': {
'$insert_id': req.get('id', ''),
'distinct_id': distinct_id, # Use charge ID or default if customer is null
'$device_id': distinct_id, # Optional, for device tracking
'time': req.get('created', ''),
**req.get('data', {}).get('object', {})
}
}
resp = requests.post(
"https://api.mixpanel.com/import",
params={"strict": "1"},
headers={
"Content-Type": "application/x-ndjson",
"User-Agent": "mixpanel-stripe"
},
auth=(event.get('queryStringParameters', {}).get('token'), ""),
data=json.dumps(e),
)
return resp.json()
- Install dependencies locally using pip install requests -t . in the project folder containing lambda_function.py.
- Zip the entire folder including lambda_function.py and the installed requests package, then upload the ZIP to Lambda.
Step 3: Configure API Gateway
- After deployment, copy the function URL from the AWS Lambda console (e.g., it will be in the format https://<random-string>.lambda-url.<region>.on.aws ).
- Note: The URL is unique to the deployed function; copy the specific URL provided after deployment.
Step 4: Configure Stripe Webhook
- In the Stripe Dashboard, add a new webhook.
- Use the copied API Gateway URL (https://<random-string>.lambda-url.<region>.on.aws/?token=<your_token>) with the Mixpanel token.
- Select all events and save.
Step 5: Test the Integration
- Open the Stripe Shell and use stripe trigger checkout.session.completed.
- Verify the webhook status and response in the Stripe Webhooks section.
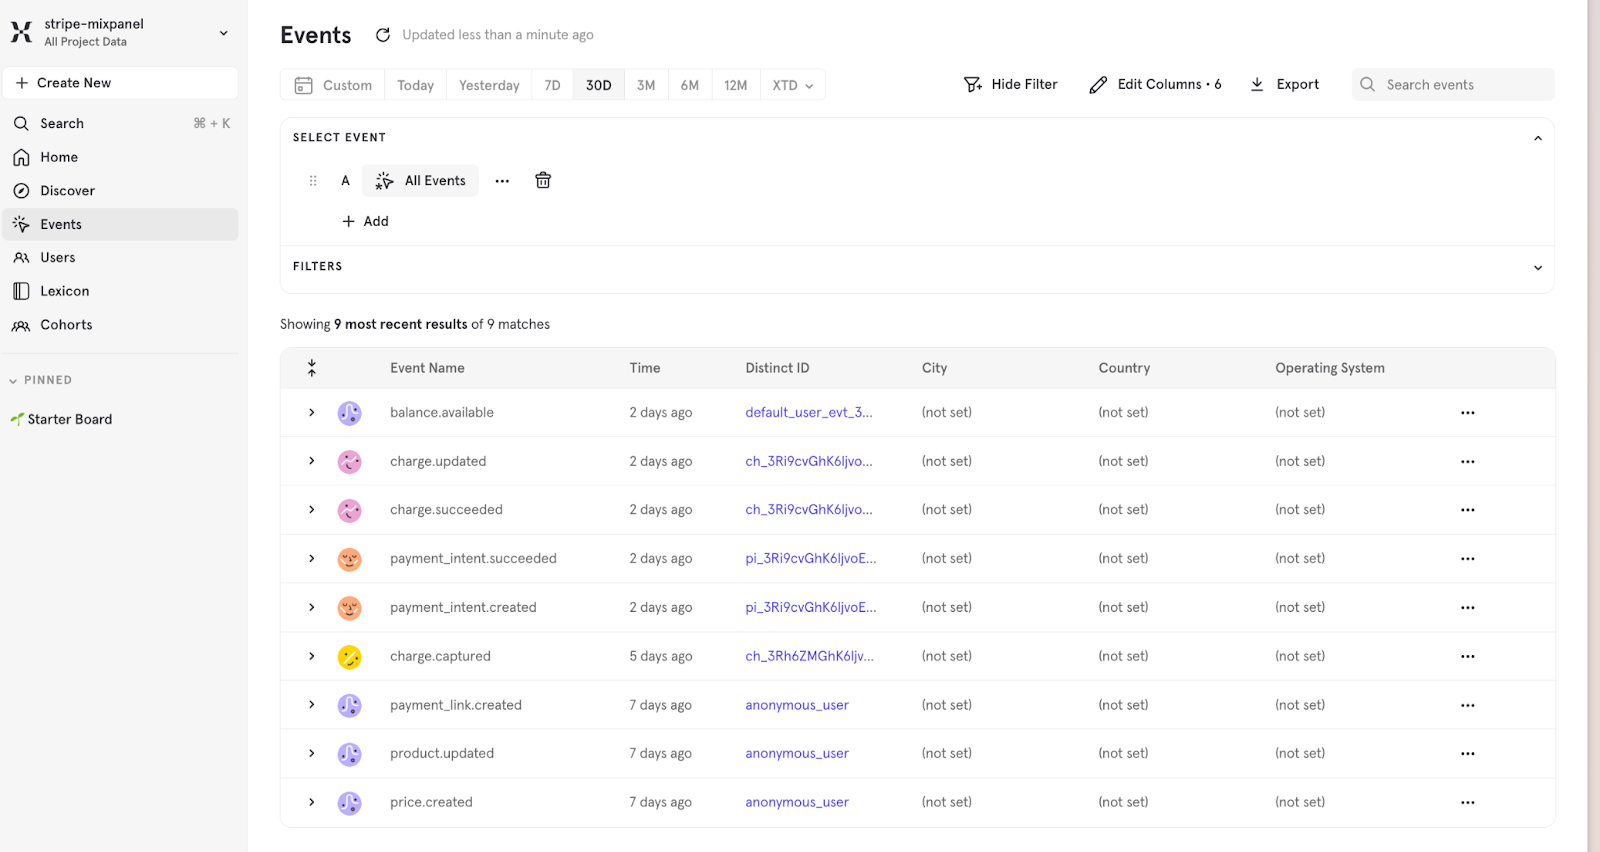
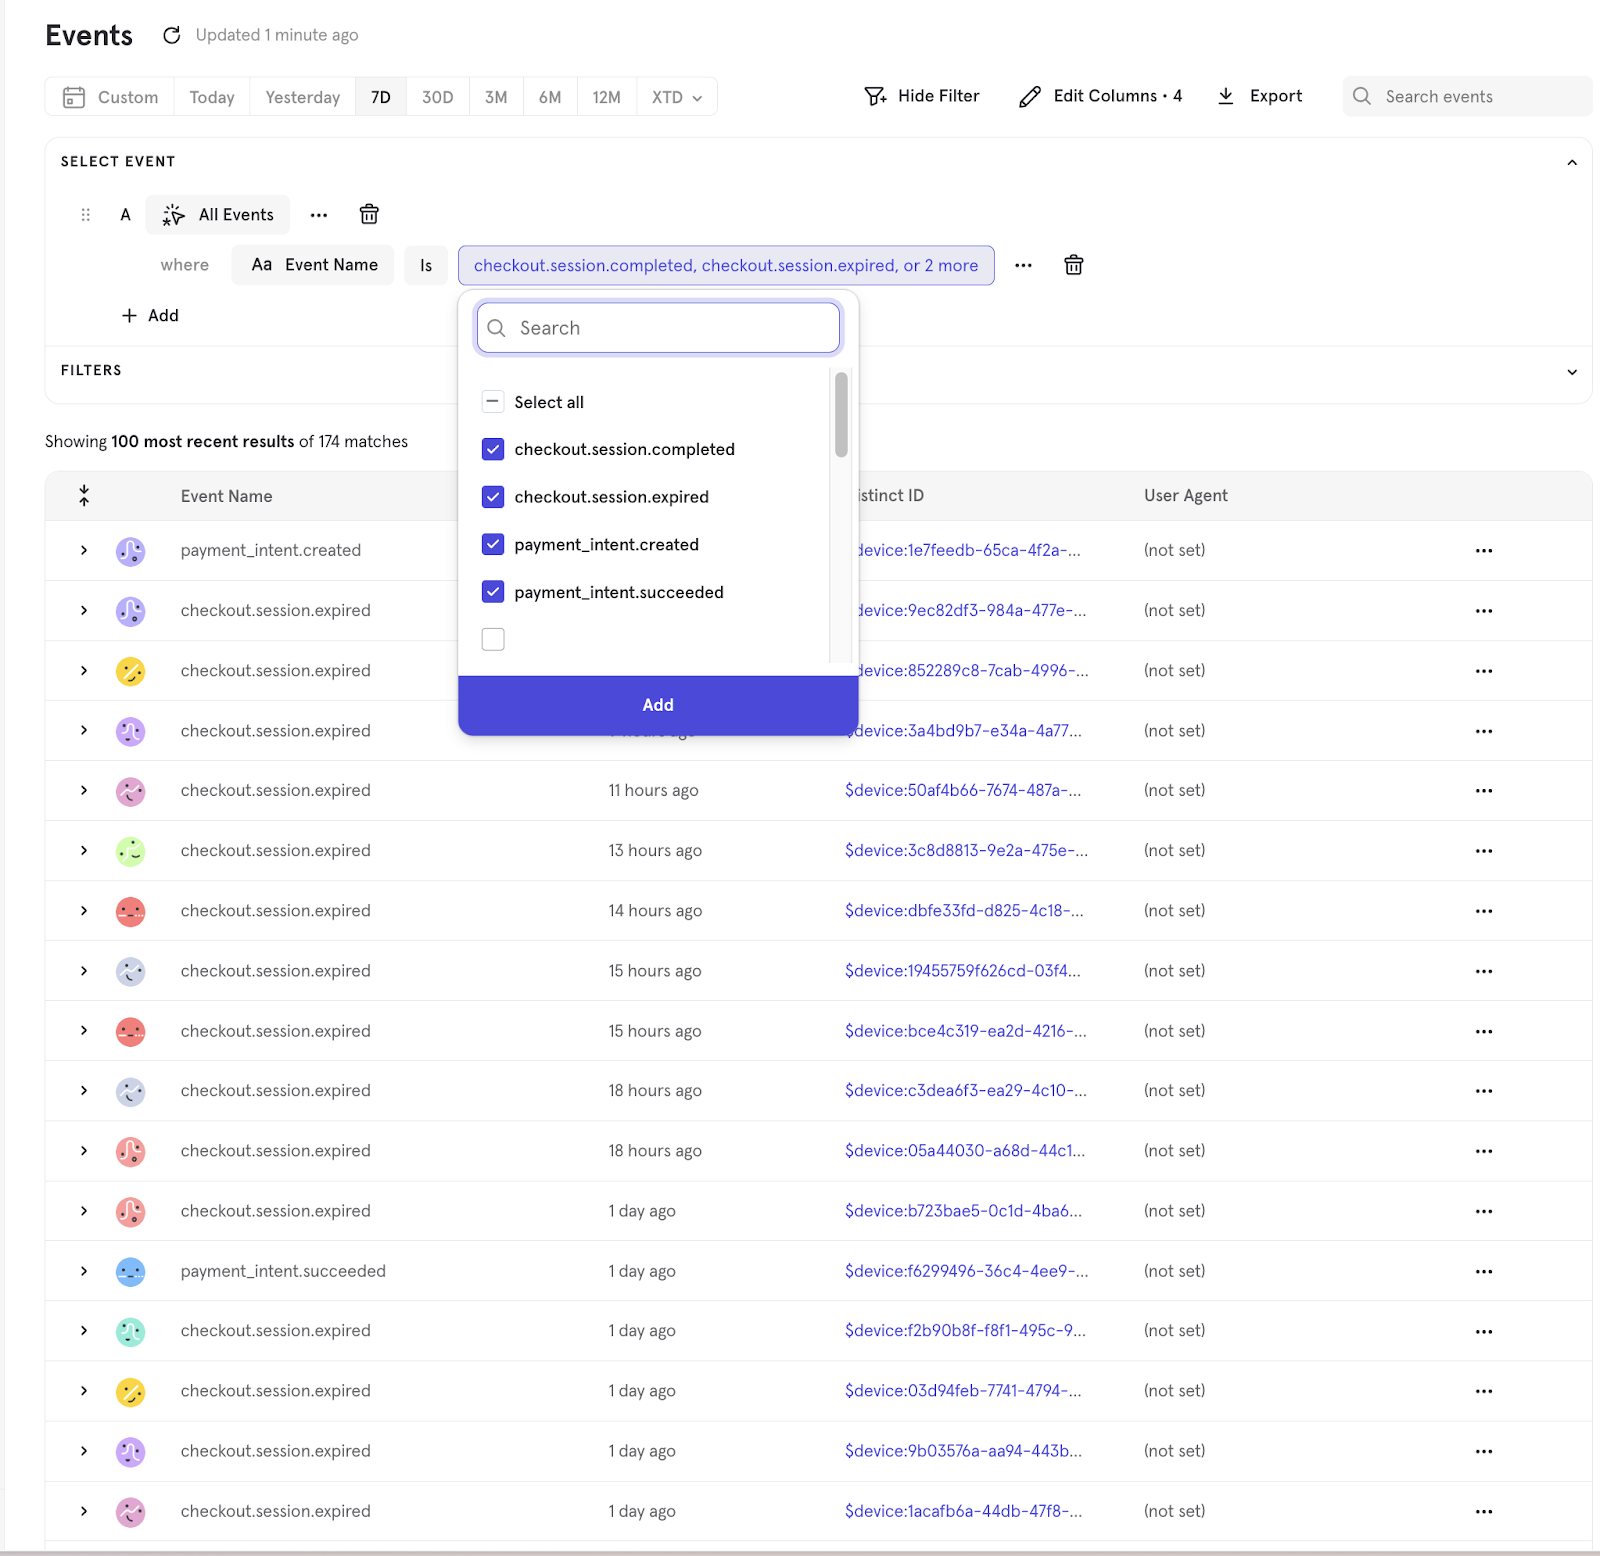
Viewing Data in Mixpanel Dashboard
- Log in to the Mixpanel dashboard.
- Go to events.
- Filter by event type or distinct_id to confirm Stripe data.
Troubleshooting
- Ensure the Mixpanel token matches in the webhook URL.
- Check logs in CloudWatch for Lambda or GCP Cloud Functions for errors.
- Confirm network access and API limits.
Conclusion
A working Stripe to Mixpanel integration is now set up using GCP or AWS. Adjust the code for additional transformations as needed.
-3.png)
-4.png)
-4.png)